Medieval House - Making Doors
Before we go on with house generation we’ll need to make our modules, mainly doors and windows. Now if you already have your modules, bought them or made them in something else, you can skip to the next part. This part is centered around making a generator for modules that we’ll later with copy stamp to get a large number of variation in our house.
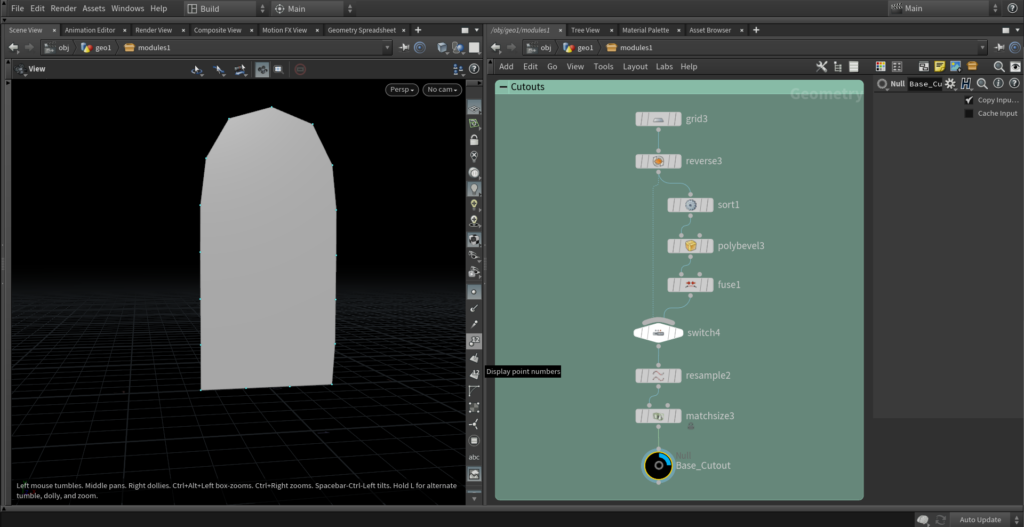
First let’s go and make a base cut-out shape, get a 1 meter XY grid with rows and columns set to 2 and reverse it because it points to negative Z by default. Sort points by Y axis. Now you know for sure that top points are 2 and 3 and bottom ones are 0 and 1, so put down a bevel, set group to 2 and 3 and type to points. Increase the divisions a bit and put down a matchsize to align it to the bottom, you’ll get a nice, generic door/window shape. If you want a square shape just make a switch that will disable the beveling.
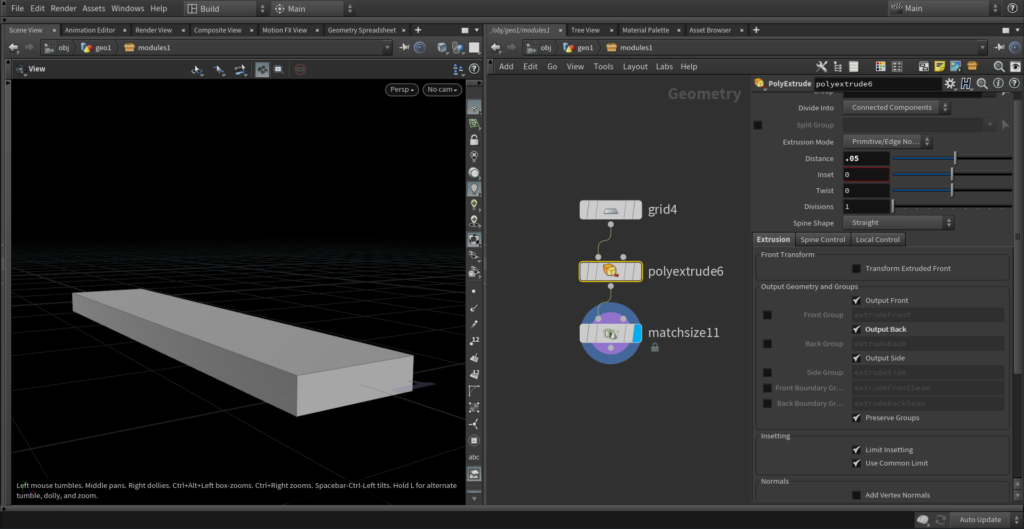
Next on is the frame. We’ll make two types, wooden one and stone one, so we can have more variation later. Let’s start with wood that’s pretty straight forward. First of all create a wooden plank, just an extruded grid, maybe 0.1 m wide, 1 m long and 0.5 m thick, these values are not important we’ll override in the copy stamp.
We’ll copy those planks on corner points of our module, this only works for square modules. The way I go about this is a bit complicated and unnecessary but it’s for getting comfortable with VEX. So create a line and type in the following:
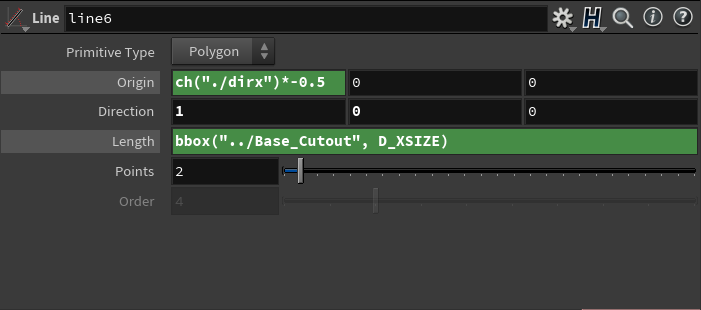
Base_Cutout is just the final form of the cut-out we created earlier, and what bbox(… D_XSIZE) does is pretty self explanatory, one in the origin offsets the line so it sits on the center. Now it’s vex time to create the missing corners. Drop down a wrangle with the following code:
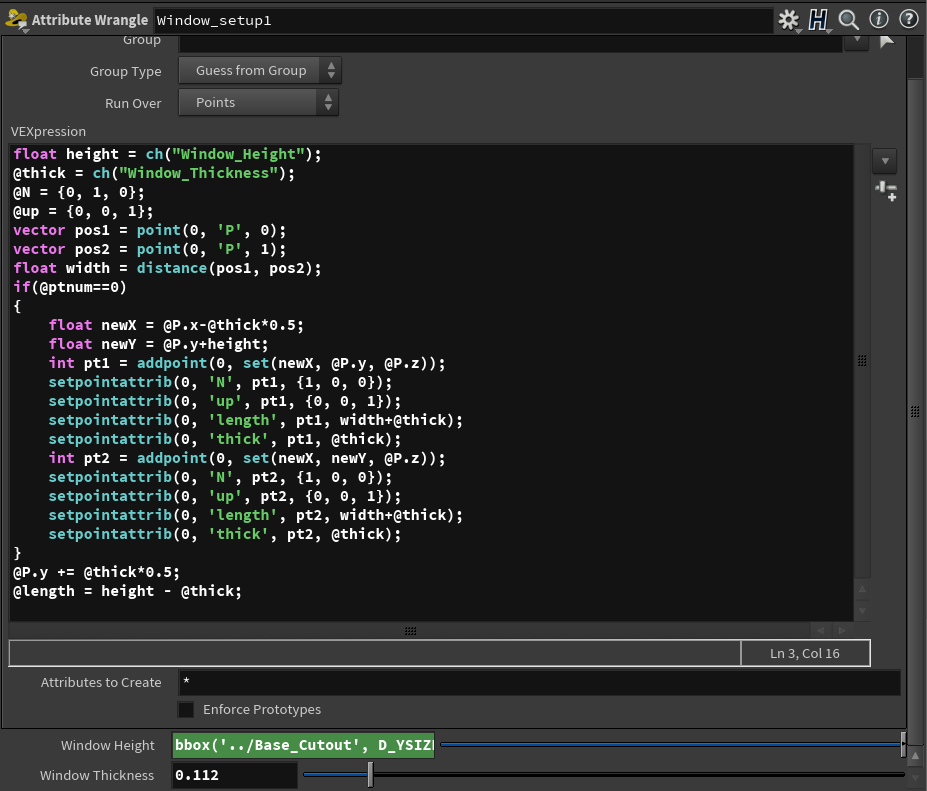
Okay so let’s now go line by line, first couple of lines is just setting attributes for a copy stamp later, then we store the width as distance from first to second point, aka the length of the line. If statement is here just to make sure we run the next block only once. In this block we create two new points, first two that we have on the line are ones that carry vertical planks so @N is pointing in the Y direction, these two are for horizontal ones so @N is in the X direction.
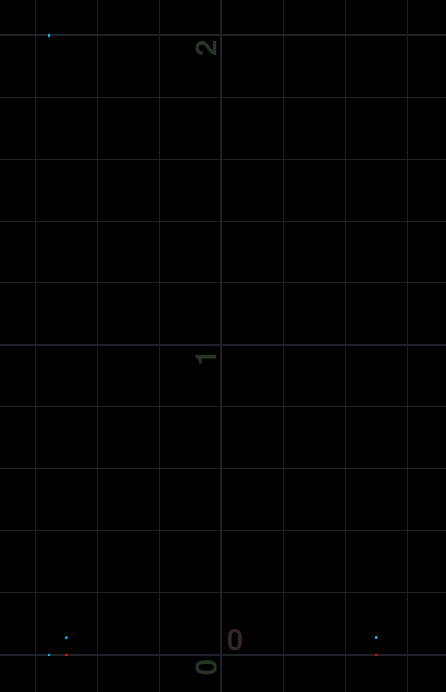
Red points is the starting line points we created. Blue points are the ones we setup for copying. Those ones on the left side are going to have horizontal planks copied to them, and the other ones are for vertical planks. Since planks have their pivot point in the center we are offsetting points by half of planks thickness so they align correctly
Let’s copy planks on these points so you can see what I’m talking about. Put down a copy stamp, check stamp inputs on and write down these:
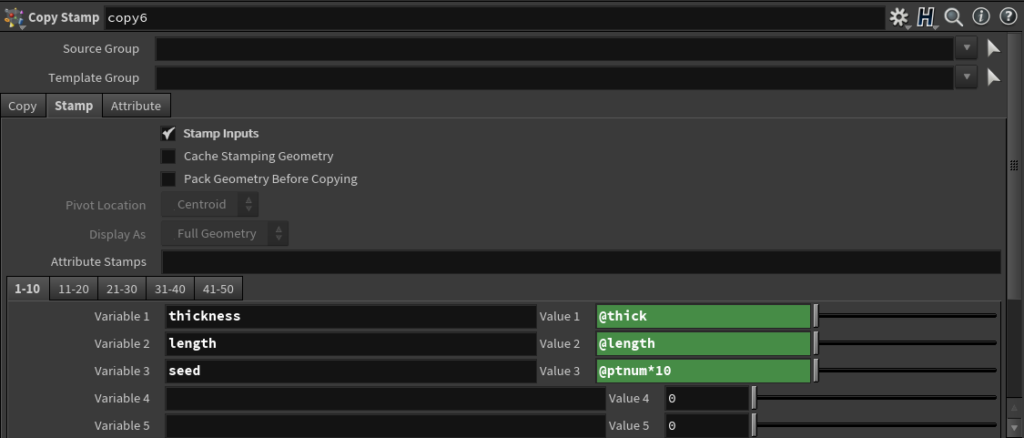
So what this does is store selected attributes to points we are copying our planks to. We can use a stamp function to reference that attribute like this:
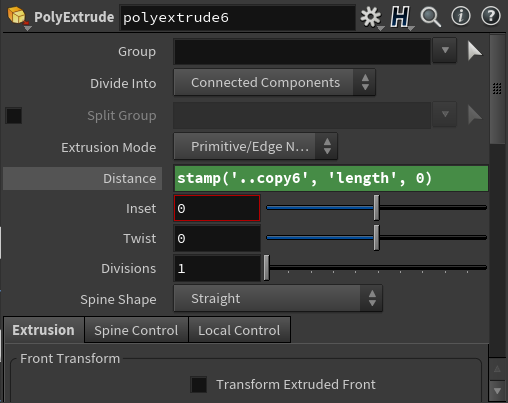
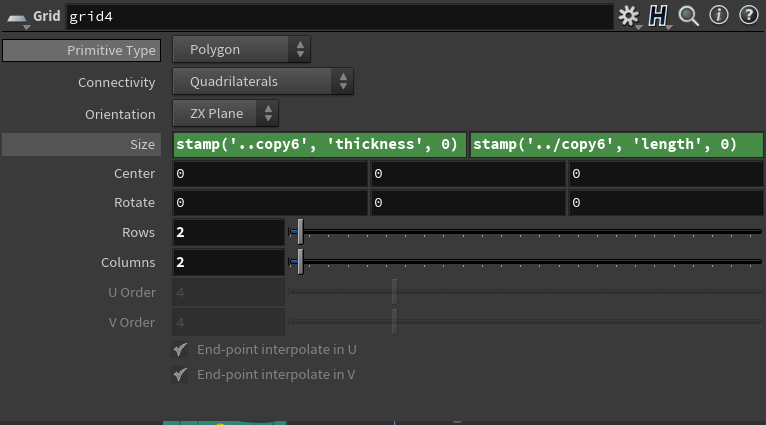
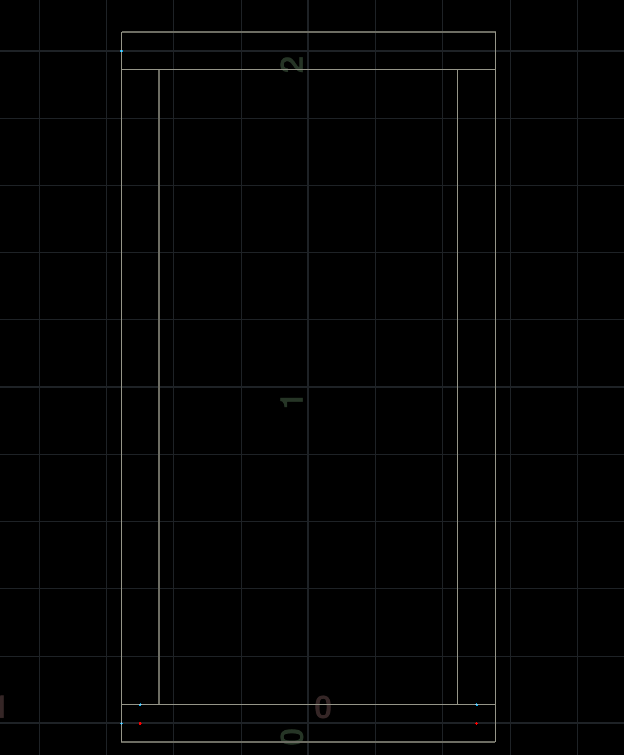
And this is the result after we copy our plank to the points.
You can see how we aligned all the planks to fit perfectly with the frame.
You might be wandering why I put seed into copy stamp and didn’t use it. That’s for adding more variation now. Increase the grid rows and put down a mountain node. Displacement will be quite aggressive at the start so put amplitude to something small until it looks good. With the same stamp function put the seed into offset. These are the settings I used, feel free to play a bit with it.
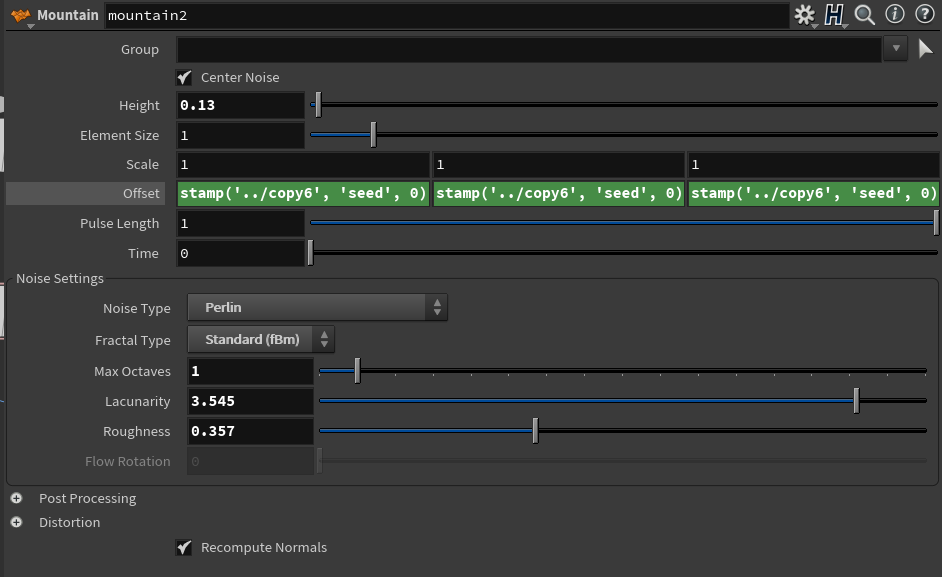
So this is the final wooden frame.
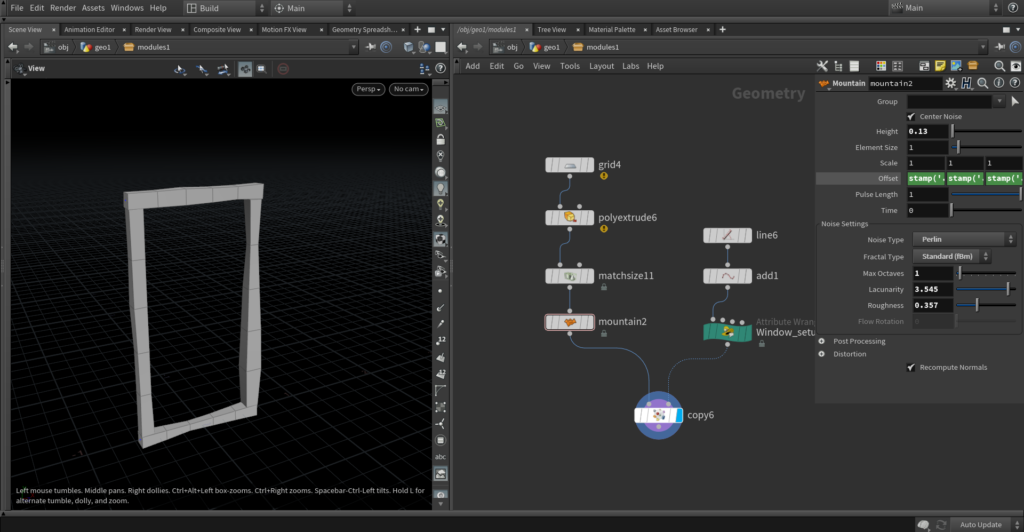
We can now move on to the second one, stone frame. This has more nodes but doesn’t need as much explaining in my opinion.
Start with the shape first. Put down a polyexpand2D to shrink our shape a bit and put it to something small like 0.08, uncheck output inside. Now a poly extrude with only sides and an inset double that of the poly expand. This gives you a frame divided into equal blocks. Now just another poly extrude set to individual components and output back, give it a bit of thickness and a bit of inset just to separate the stones. In the end you should get something like this.
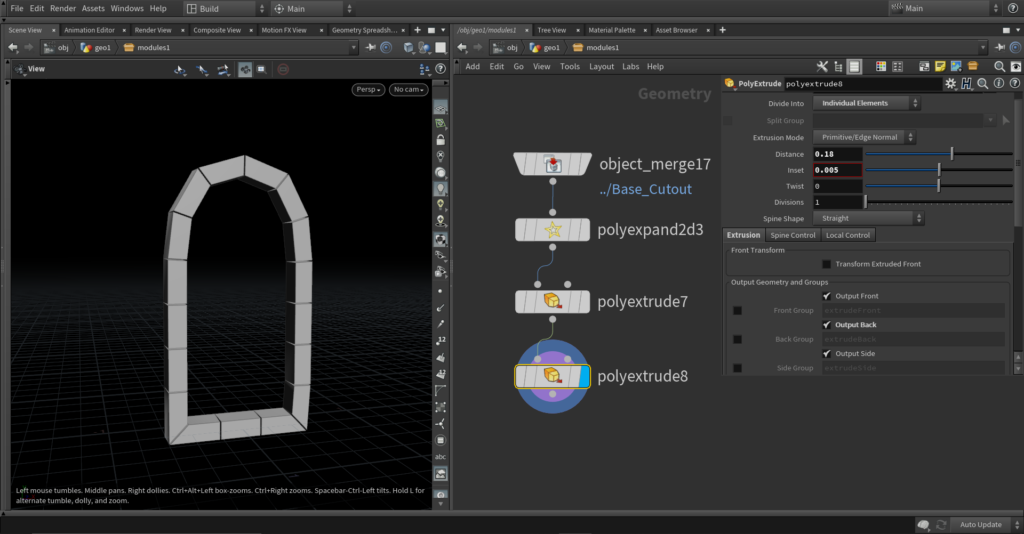
That looks cool but let’s play a bit more. Append a clean sop and check manifold only topology, this is just so we don’t get any nasty errors it’s a good idea to put a clean after extrusion or remeshing. Now down with a normal, subdivided and mountain. Play with settings on the mountain a bit and find what looks good for you, on the subdivide put as much as you think you need but don’t go crazy because we are gonna copy a bunch of these around later. Then just a bevel to get rid of those sharp edges if you want to, it’s not necessary. Lastly a match size to center it correctly on X and Z.
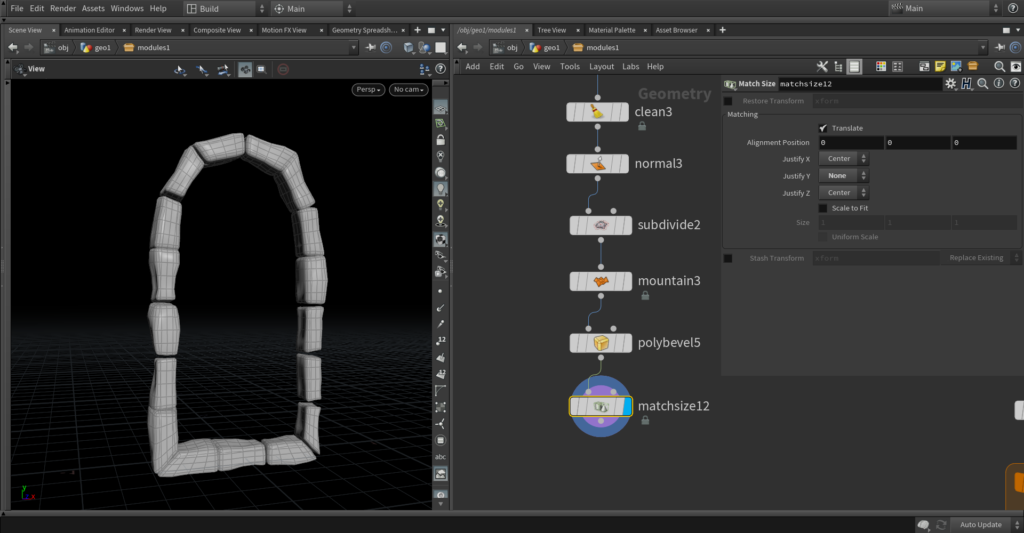
That’s the frame done. Now we are going to create the base, then we’ll add some ornaments and a handle. The base will be wooden planks, they are either going to be oriented vertically or horizontally.
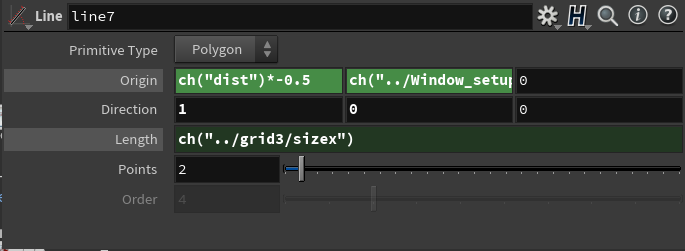
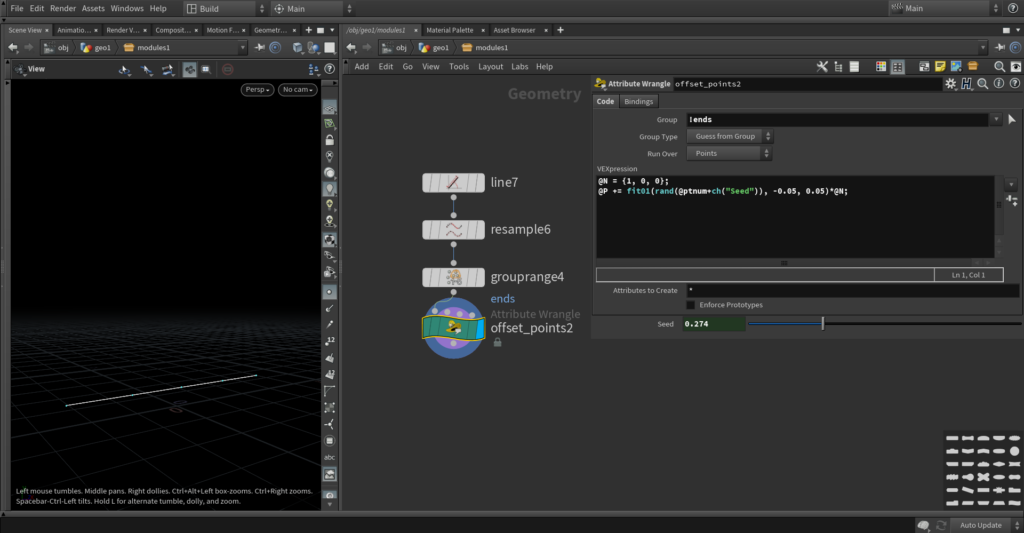
First put down a line that’s pointed in positive X. For line distance reference the block-out grid X size, for the origin in X set it to half of the length. Lastly in the origin Y position reference the frame thickness and multiply it by half. Resample the line to get more points, resample length will be the width of planks door is made out of so don’t make it too short. Group ends with a group range node. Then we’ll need a wrangle. In the wrangle operate over everything except ends group (!ends) and write this:
@N = {1, 0, 0};
@P += fit01(rand(@ptnum+ch("Seed")), -0.05, 0.05) * @N;
So what we are doing here is offsetting points randomly along the line to make our planks spacing differently.
Now we’ll get onto making planks, I have two ways of making this. First one is the one I did when I was creating this project a year ago, using copy stamp and calculating the width of planks with a wrangle. But there is a more straight forward and easy way to do pretty much the same thing. If you want to check out how the first method is done you can download the original project from my gumroad.
Now let’s go on for the easy method, just put down one extrude and check transform extruded front. Put the mode to global and offset on Y for the height of the door.
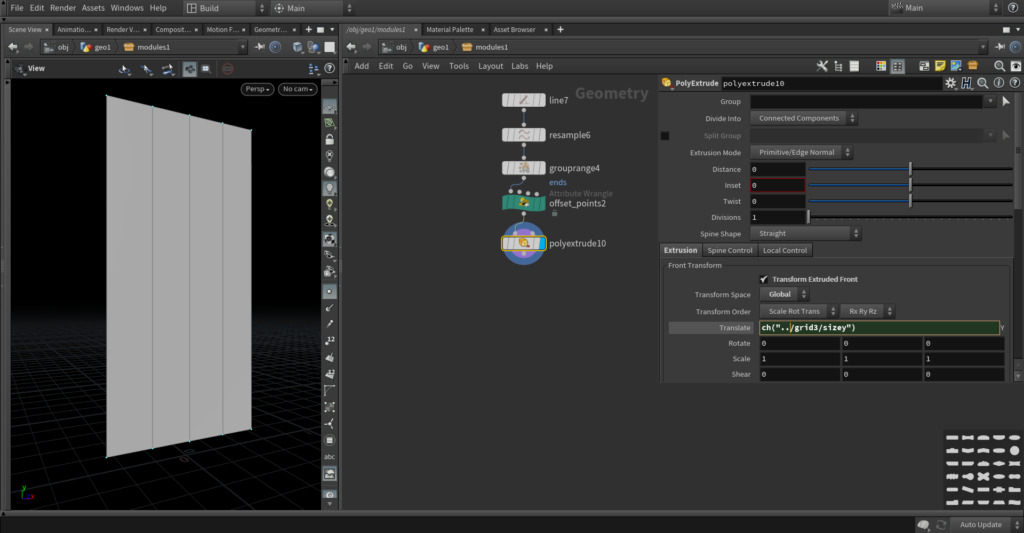
Before we make planks out of these polys we need them separated. Facet node does that for us, just check unique points. If you want to separate a the planks a bit more you can put down a expand 2D node.
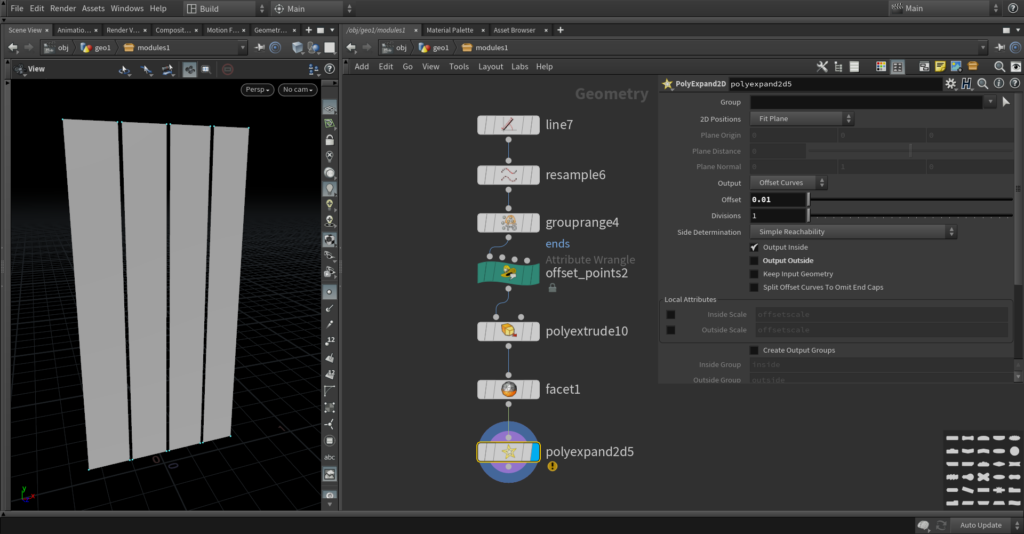
Now the same process as for the planks before. One so extrude for thickness and divide so we have more resolution with noise. For noise displacement we’ll use point VOP. Let’s put one down and dive in.
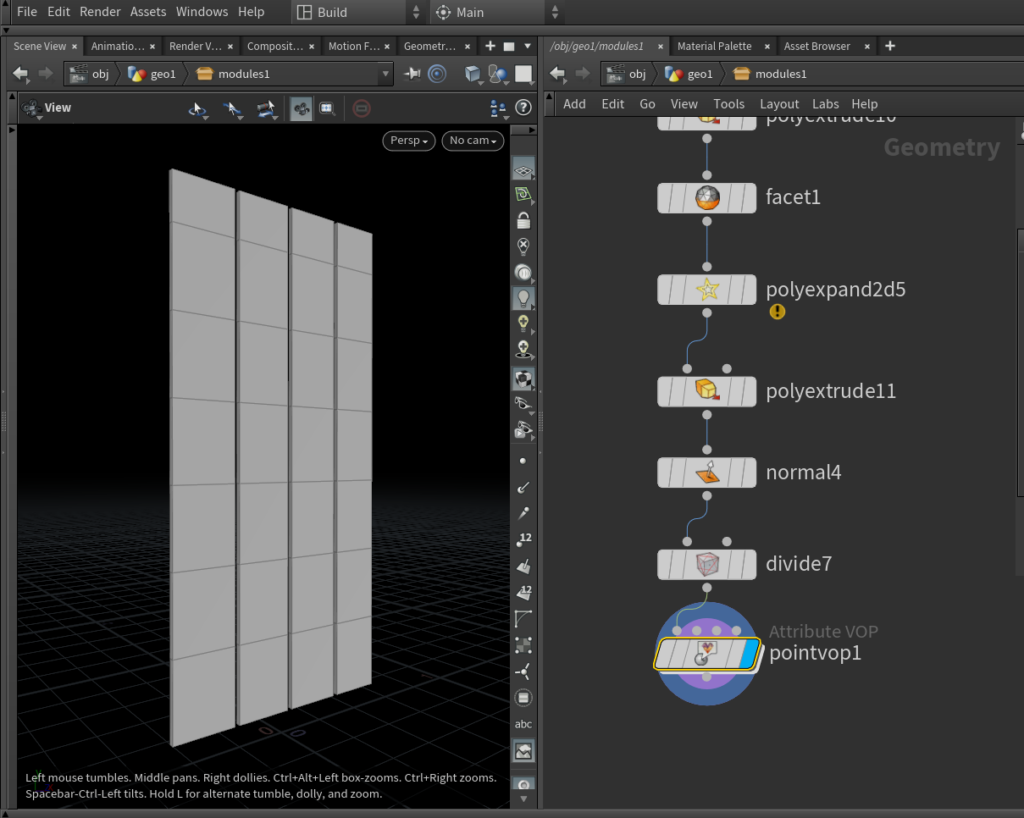
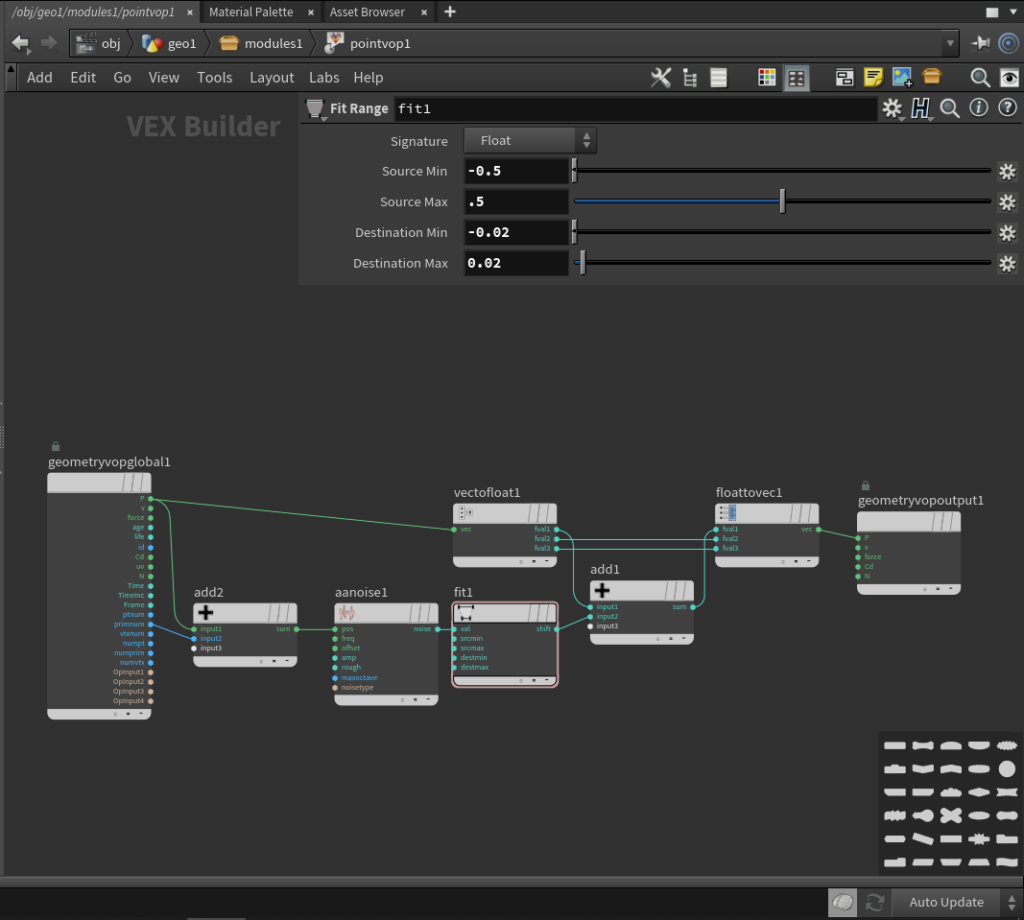
What happened here is really simple. We have anti-aliased noise that we add to our X position. Noise values go from -0.5 to 0.5 and that’s a bit too much displacement so we fit it between too low values, for me it works 0.02 in positive and negative. You may have noticed that at the start I added primnum to the position for noise. This is just so there is more randomness, each primitive will be a bit offset so noise doesn’t continue over the doors.
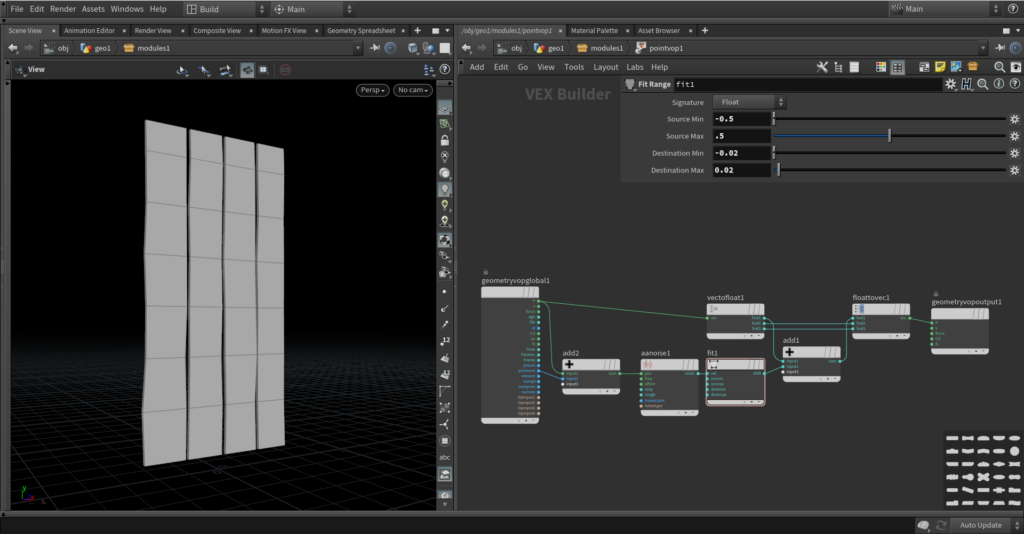
So that’s the base for our door. If you want to have horizontal planks it just a few adjustments to the current setup

In our starting line we reference the Y size of the block-out grid and make it face to the Y direction.
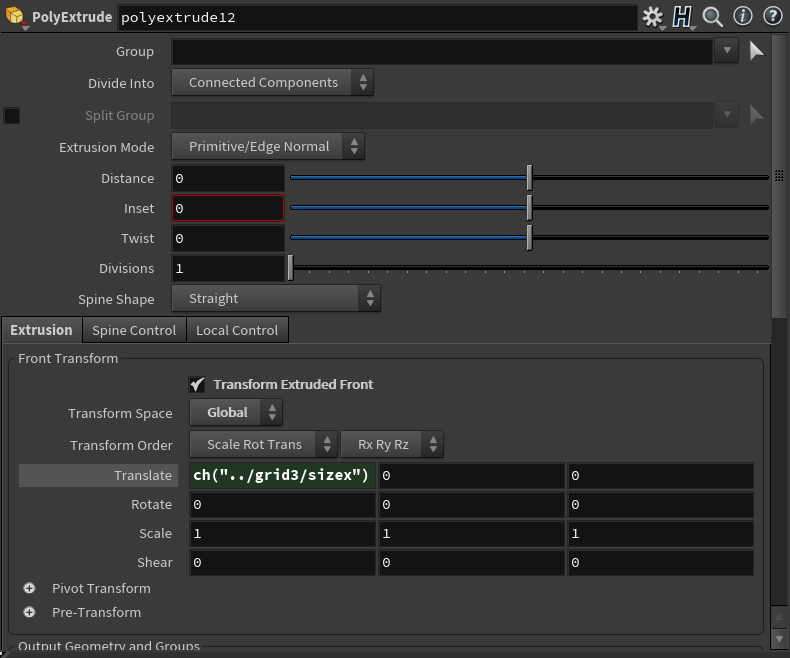
Extrude it on X by X grid size.
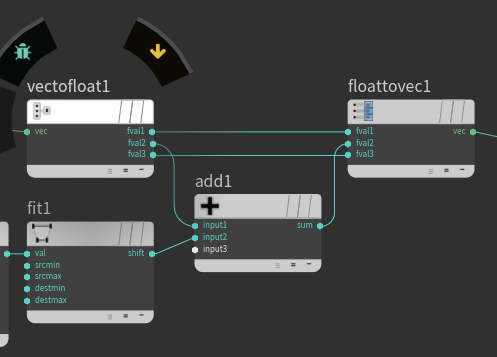
And lastly just change the axis you add the noise to.
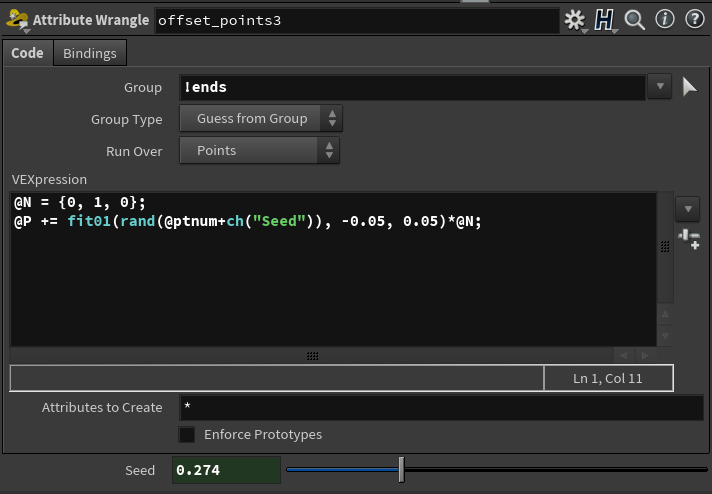
In the wrangle set normal to Y.
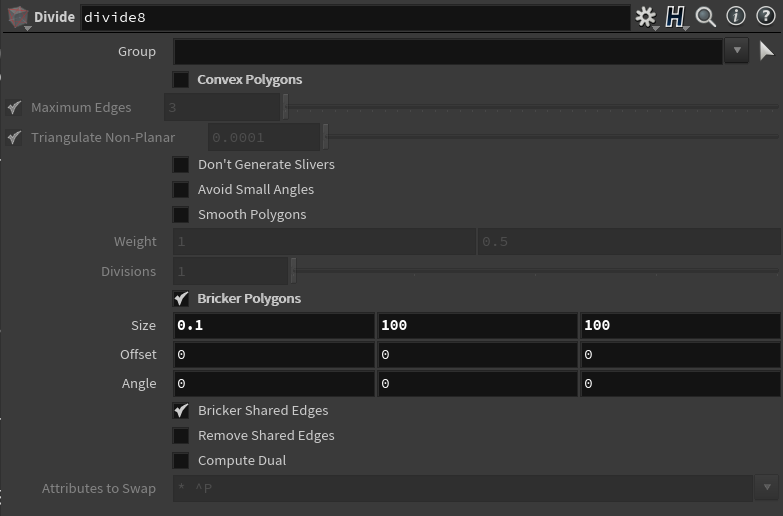
Change the axis on divide.
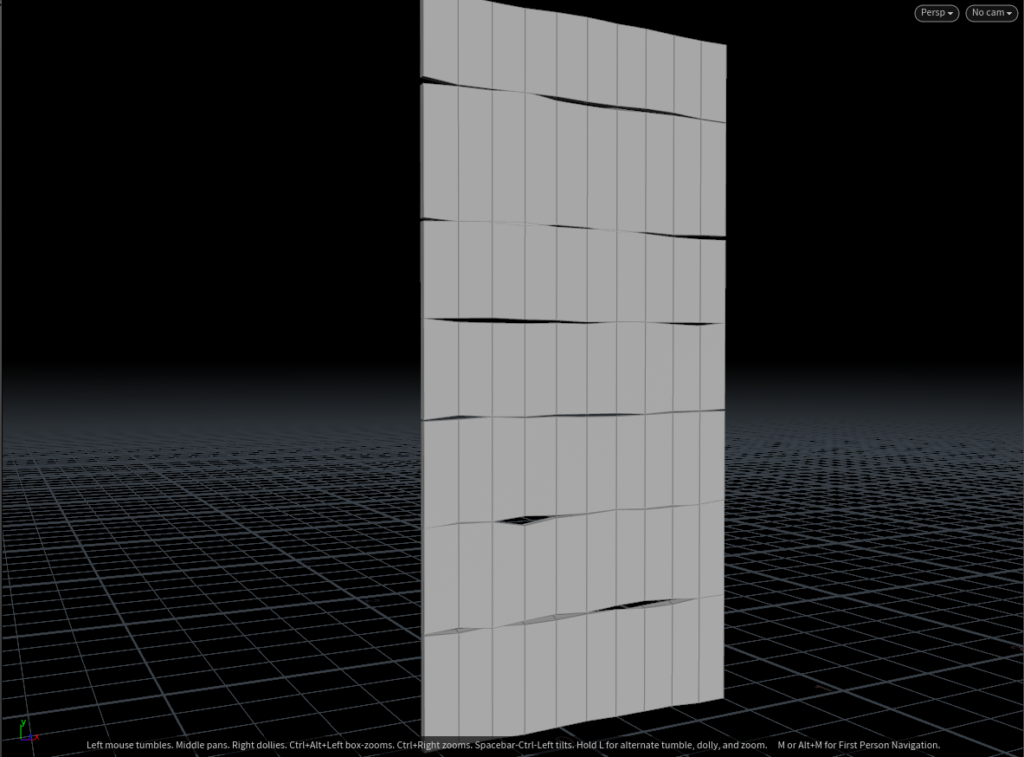
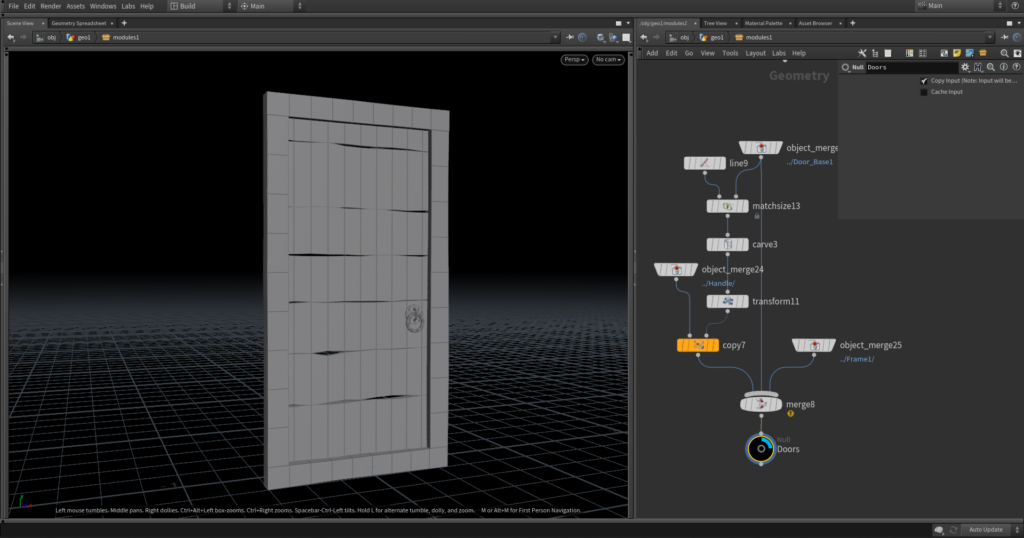
And that’s the result after adjusting.
Last thing we’ll add to the door is a handle. I modelled a simple one, it’s just two rings and a circle nothing fancy. Next we need a point to copy it to. Put down a line and a match size. To the second input of match size put the door base. Set scale to fit and position on X and Z to max. Now append a carve and carve the second position, this will control how low or high the handle will go. After playing a bit with that get a transform and set scale X to something like 0.7-0.9. Last one is a copy, in template group type 0 and copy the handle on it. As we are done we can just merge everything we have got.
