Medieval House - Making Windows
With that we are done with our doors, next we’ll make the windows. Object merge a base shape. We need to make that cross shape that divides our window into four areas. There are a few ways to make that and we’ll cover two.
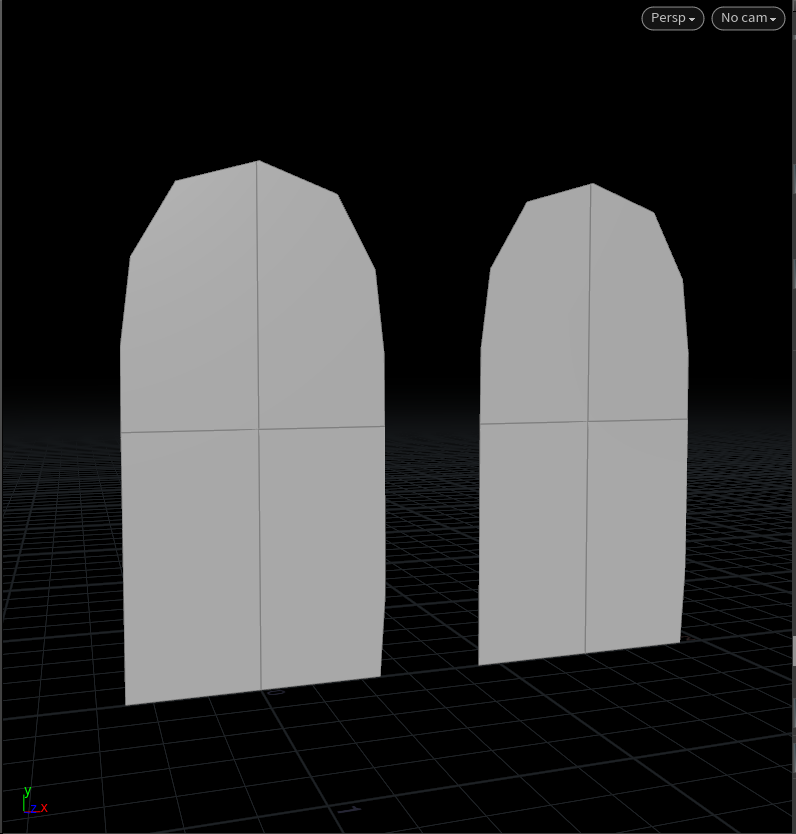
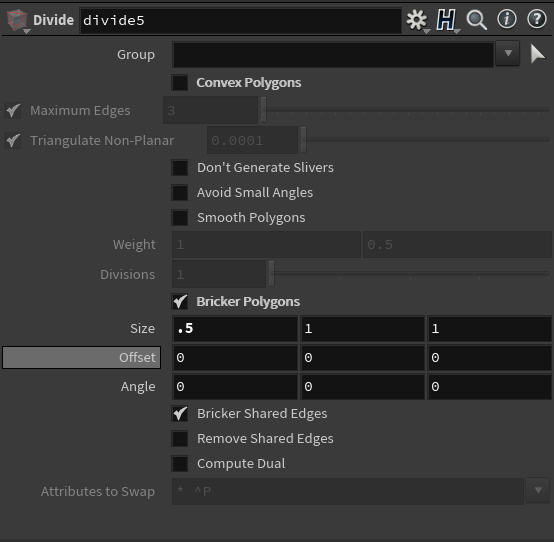
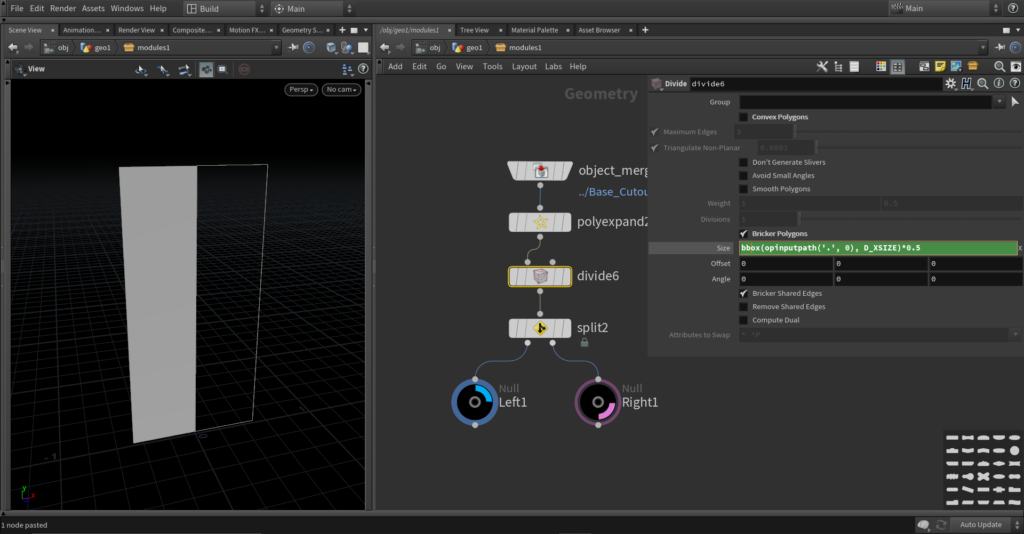
Both methods give same results and you can use whichever you prefer. First one is just a divide with bricker polygons. I put in explicit values in here in X and Y axis but this won’t work if you change the dimensions of the window. So to make that a bit more procedural we’ll again use bbox().
//Size X
bbox(opinputpath('.', 0), D_XSIZE)*0.5
//Size Y
bbox(opinputpath('.', 0), D_YSIZE)*0.5
We have already looked at what bbox does but what opinputpath does in this case is it gets the geometry that’s connected to the first input.
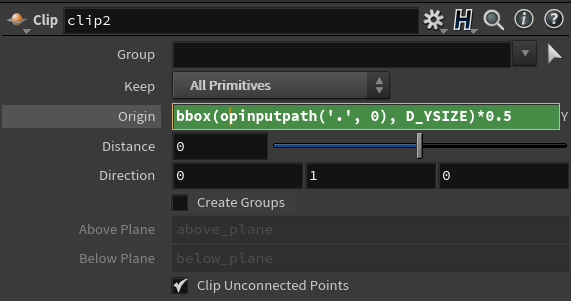
Second method uses two clip nodes, one is set to point in the X direction on in the Y. Both of them are set to keep all primitives. Only thing you need to do is to make the Y one start from the centre of the shape. To do that type in the origin the same thing we did in the Y size a minute ago.
Now we need to add some thickness to those lines, we’ll use a bevel node, play a bit with the offset, for me it works great with 0.1-0.2.
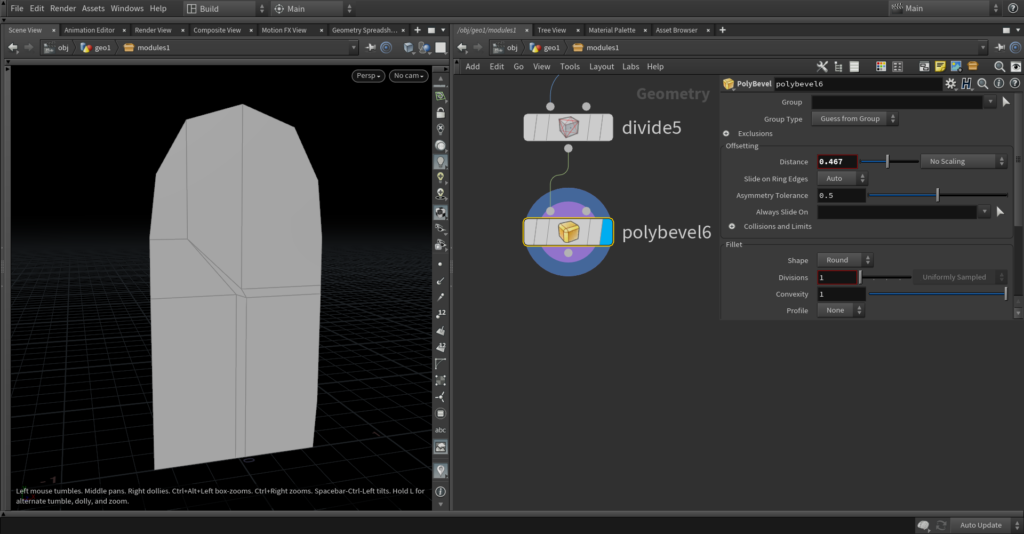
If you put too much offset to the bevel you may get this error. Reason for that is that offset points collide with the points that area already in the geometry, Bevel stops when it gets to an existing point. What you can do about this is put down a facet node and check delete inline points. It will get rid of points that lie on a flat line, or almost flat line depending on the threshold you put in. Works best when you have a square shape. For now I’ll stick with just having a small offset, looks best like that anyways.
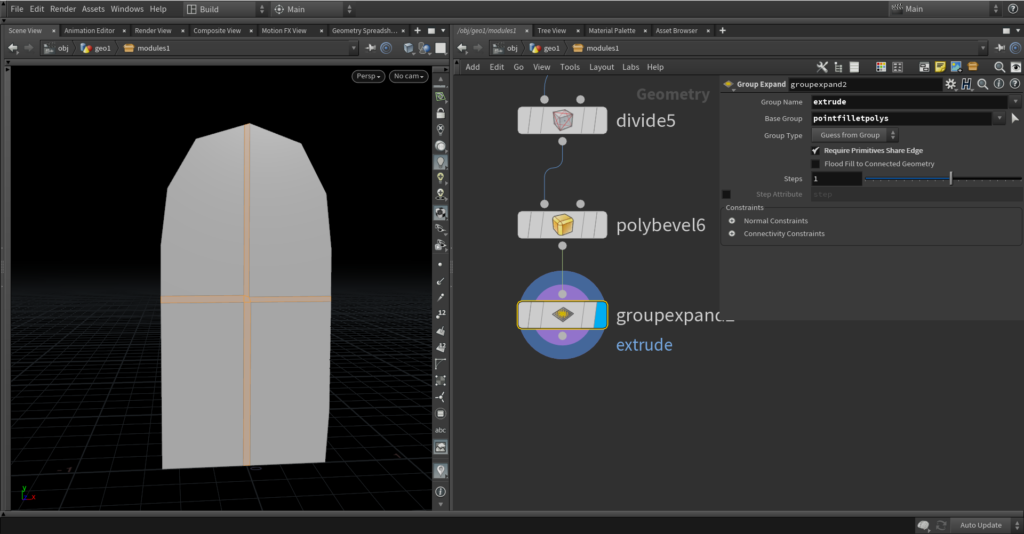
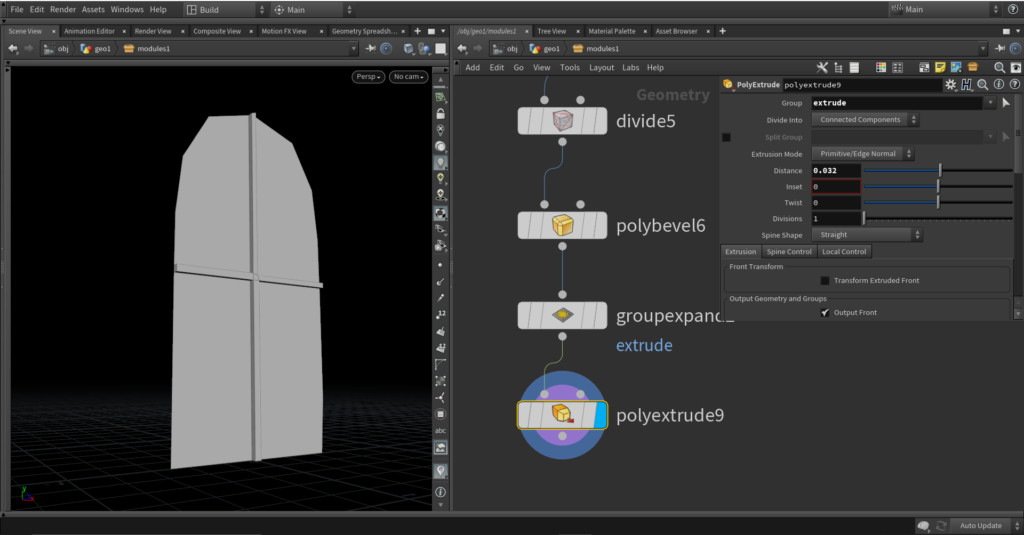
Now we need to extrude that cross but we need to make it procedural. In the bevel in output groups check the point fillet polygons. Then put down a polyexpand and expand that group since it’ll only contain the centre square. Also in the expand check that it requires shared edges. Now we’ll have our cross selected in a group just put down an extrude and extrude that group.
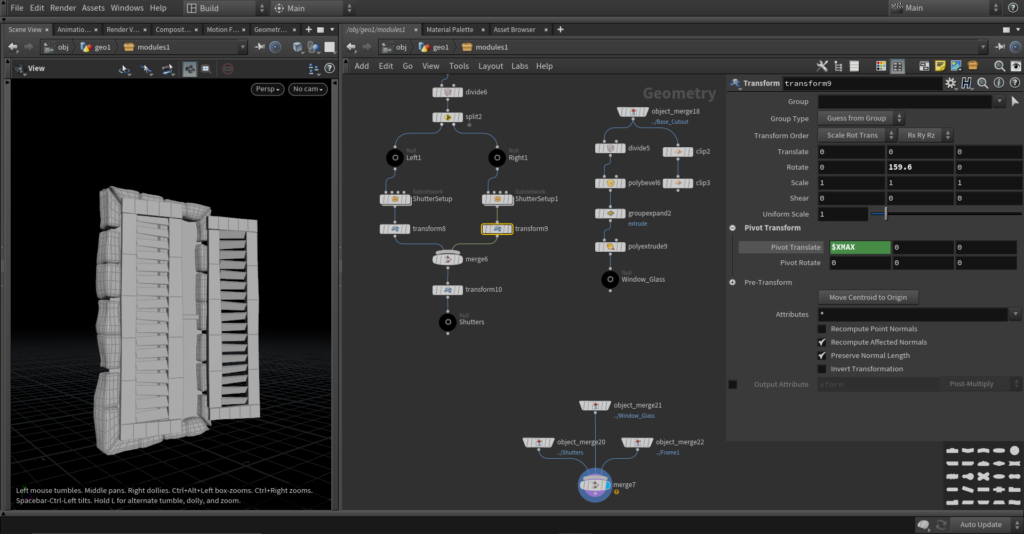
Now we are going to make a shutter for windows. Again we’ll need a different approach if the frame is arched or rectangular. First let’s not bevel the edge and just handle the rectangular shape it’s easier.
So what I did next is got the base shape, polyexpanded it to make it a bit smaller and then divided it in half with the parameters you see below. Then append a split and in group type 0, since there are only two polygons it just isolates each one, 0 will always be the left one in this case.
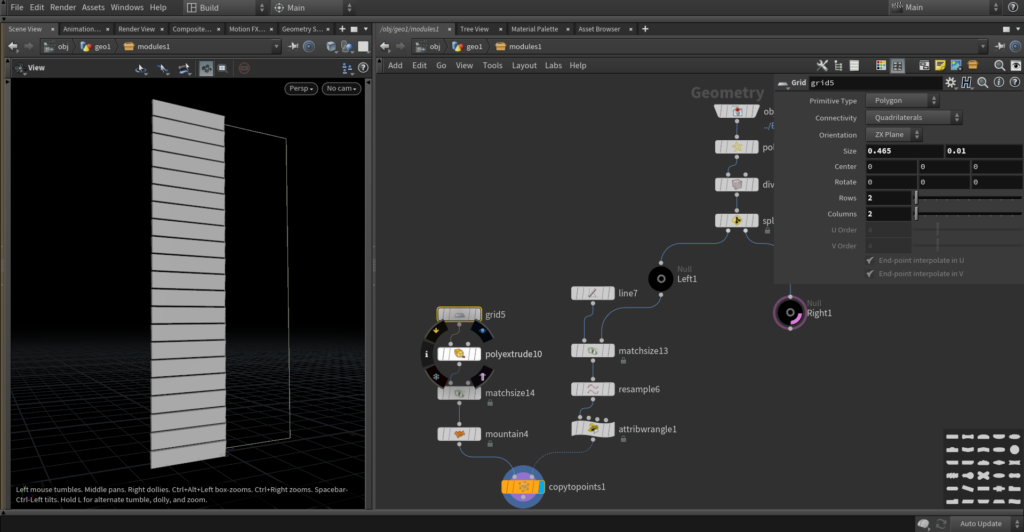
We’ll focus only on the left one now and then repeat the same process for the right. Drop down a line and a matchsize, line goes to the first input and left shutter to the second one. In matchsize set scale to fit to true. Resample the line with default parameters and drop down an attribute wrangle. This will be fun , for now don’t do anything with the wrangle just append a copy to points and place our plank from before on the resampled curve. It should look something like this.
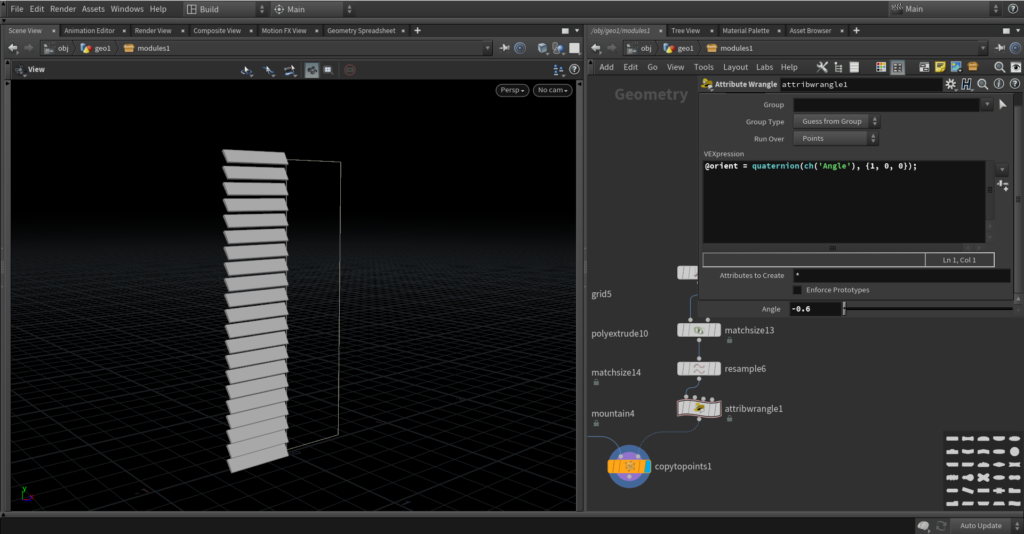
Now go in the wrangle and we’ll play a bit with quaternions. Write the following:
@orient = qutarnion(ch("Angle"), {1, 0, 0});What this does is make a orientation attribute that rotates on the X axis based on the angle you provide, it’s in radians. Put different values in the angle and see how it goes.
Next let’s introduce a bit of randomness. We’ll create a random quaternion with this:
vector4 rand = quaternion(fit01(rand(@ptnum+ch("Seed")), -$PI, $PI), {0, 0, 1});
@orient = qmultiply(@orient, rand);
So what this does is creates a random rotation around the Z axis, seed is to control the randomness, fit01 scales the random angle from 0-1 to -PI to PI which is a Houdini default for 3.14… Then we multiply two quaternions together so we have both our random rotation around the Z as well as our rotation around X from before.
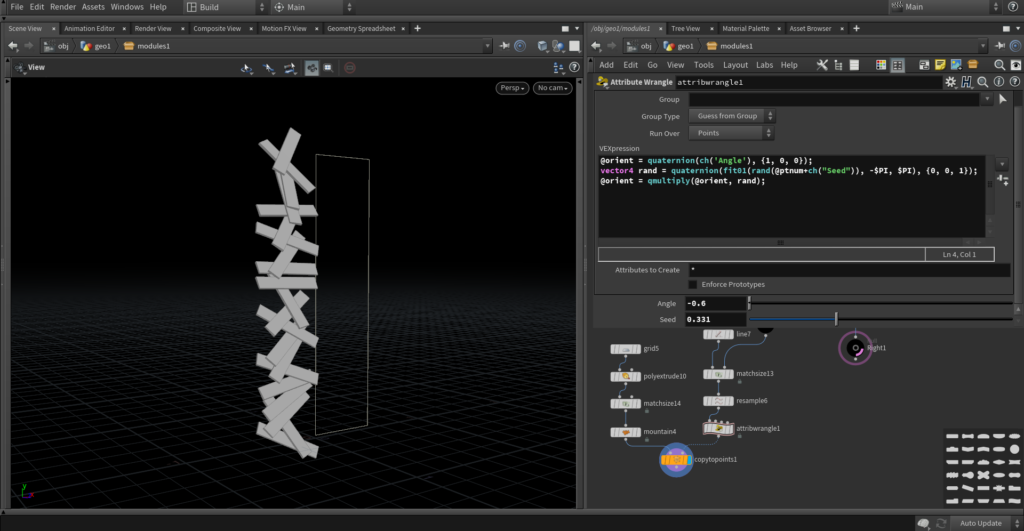
Okay so that’s a bit too much random yeah. Let’s see how to controll that a bit more. One way is to make the angle in fit01 less then PI in both ways. But I want to show you another cool and useful function so let’s do that. The function is slerp and it’s used to interpolate between rotations, as oppose to the normal lerp that interpolates linearly.
This is a little explanation of the difference between lerp and slerp. If you want to go more in depth on rotations and quaternions check out Freya Holmer on YouTube.
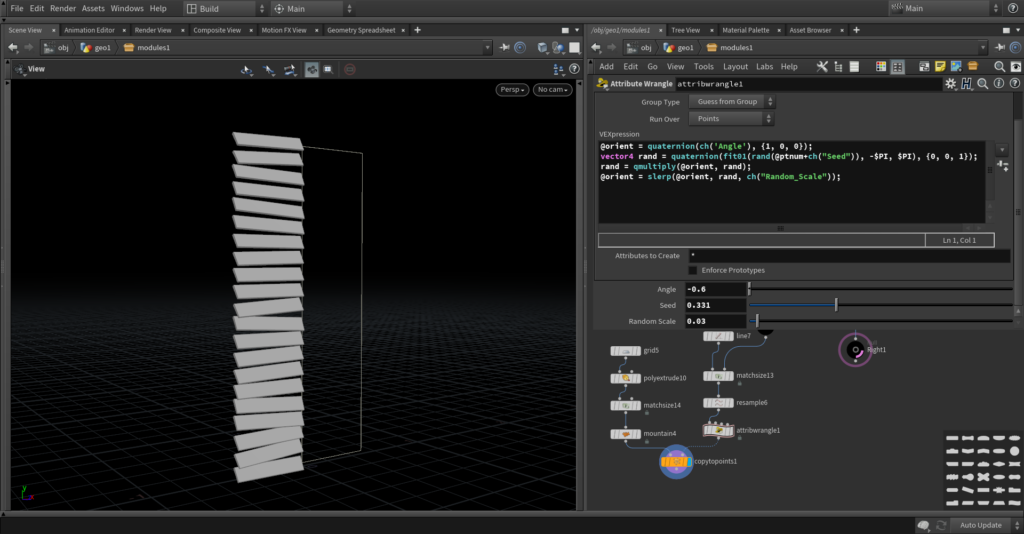
So that’s our shutter almost done. Now just the frame. For that we’ll use the same system as for the wooden frame, you can literally just copy the whole setup. Of course we need a line from which we’ll make a frame. So put down a line with matchsize just this time place it to point in X axis and minimum in the Y position.
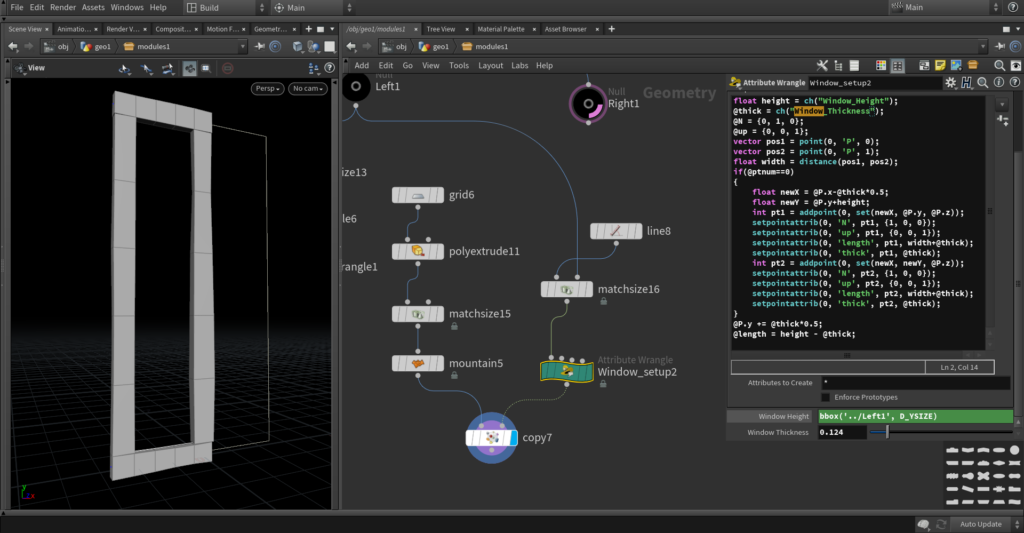
Now if you merge these two things you may find that they overlap a bit. To fix that we need to proceduralize the lenght of shutters. Their lenght need sto be size of the the left/right side with subtracted thickness of the frame. In my case that expression looks like this, for you copy the thickness parameter form the frame setup and past the reference.
bbox('../Left1/', D_XSIZE) - ch("../Window_setup2/Window_Thickness")One more thing to take care of is first and last point, they also overlap the frame, with a group by range node select them and copy the shutters on everything except those two.
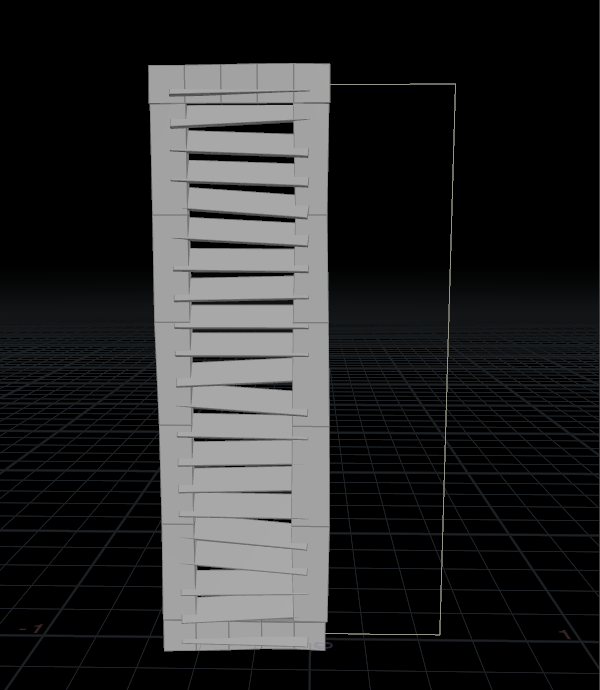
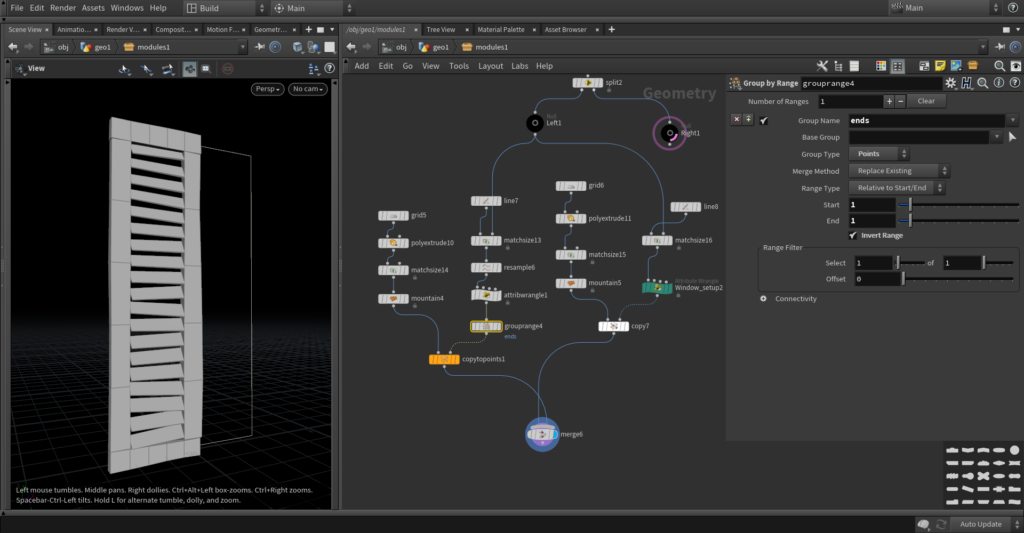
Now put everything into a subnet and copy over to the right side. Why we separate these two is so we can rotate them differently, get a window open or closed.
How we rotate the shutters is simple, in the transform node you can change where the pivot point of transform is, and there is also a houdini default that get’s the minimum or maximum of the geometry in the current node. For the left shutter put in the pivot X expression XMIN and for the right one XMAX. This will rotate the shutter just like a regular window should rotate.
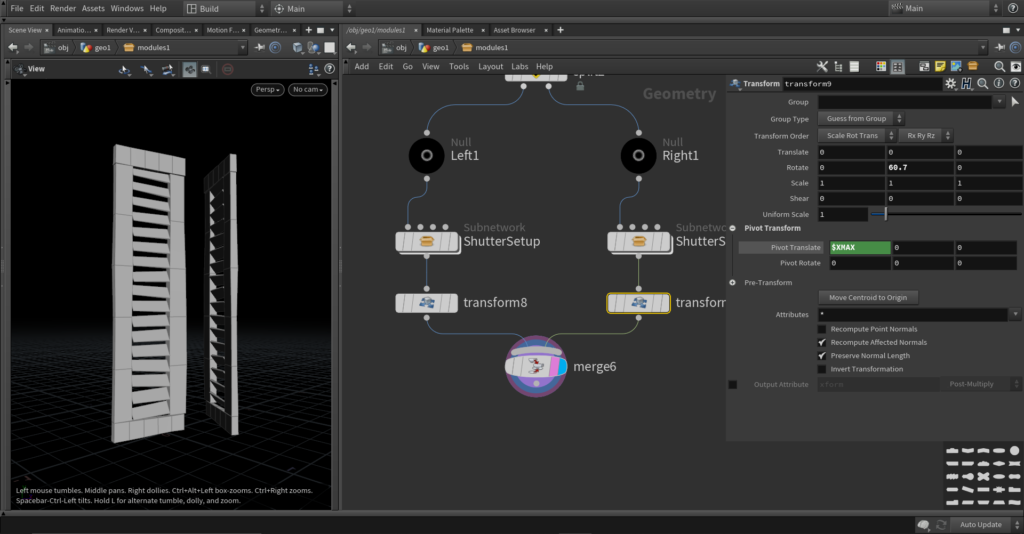
One last thing before we get the windows done with. If you merge all the parts you’ll find that shutters overlap the frame. To make them not, we need to transform them out in the Z direction a bit. I think you know what’s coming next, bbox again, down witha transform, in the Z reference the frame node and put D_ZMAX as the value. Now the window should be done.
