Medieval House - Modules HDA and placing modules
We finished last time making the modules and now we’ll make an HDA to expose some parameters needed for placing them.
When making an HDA and exposing the parameters it’s really tempting to just give the used all the functionality. That can be desired but is in most it’s just overwhelming and unnecessary.
You have to think about what you need.
For our example we have an HDA that makes:
- either doors or windows
- that’s a specific size
- with either a wooden or stone frame
- that can be round for doors
- doors have a specific pattern
- windows can open
In the end your HDA interface should look something like this:
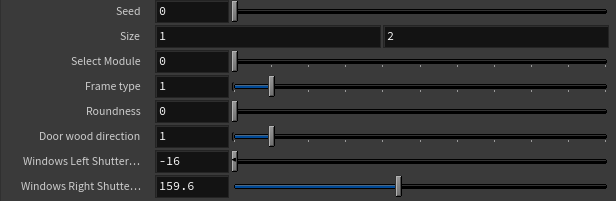
Last thing regarding out modules asset is to make a second output.
Drop down a output node and increment the output index on it, connect it to the base shape, our grid that serves as a foundation.
The grid will be used to make holes in the walls where the modules are gonna be in.
We can now get to placing them.
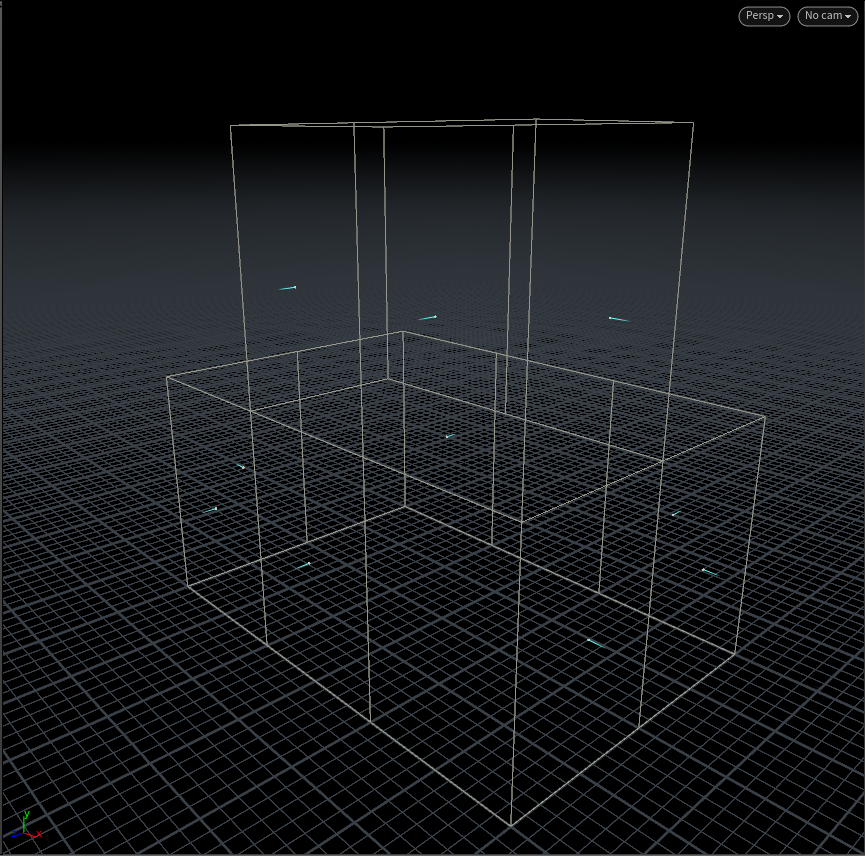
Logic behind this is we’ll get the base body and isolate the center points of each face.
These points have no them a module type and that will be used to identify if and which module will be placed.
Then we’ll use the power of randomness to add some variety in form of size, frame type…
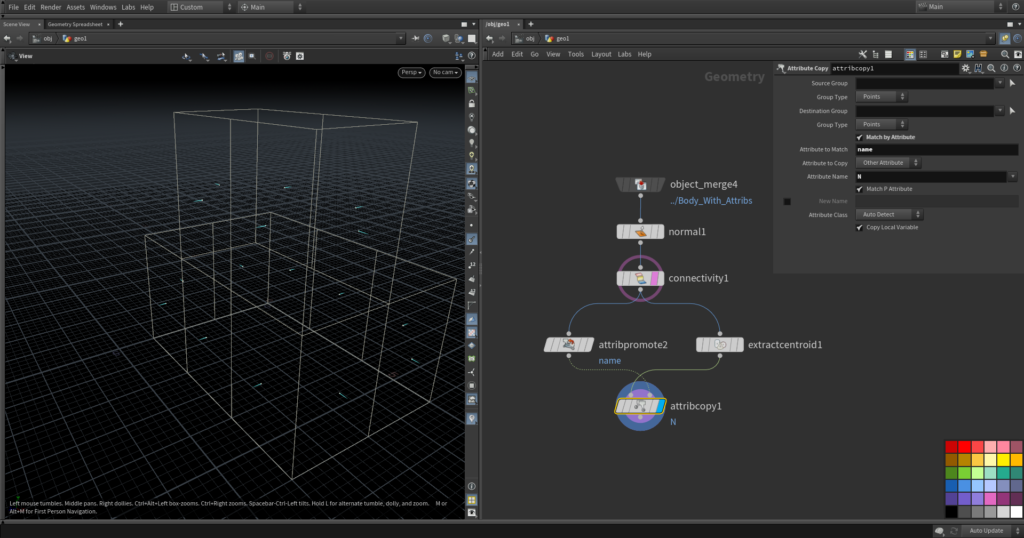
Let’s get to work, as I said get the base with attributes, drop down a connectivity node for a name attribute and extract the center points with, conveniently named, extract centroid. One thing to do before is if you don’t have normals on your points just drop down a normal node set to points or an attribute wrangle with:
@N = @N;Now if you check the points we got you’ll notice that the normals are not transferred when they are extracted. We need to copy them from the original walls, that’s why we needed the normal node.
From the connectivity drop down attribute promote. Promote “name” from primitives to points. This will be needed to transfer normals.
Now we need to set some basic attributes that copy stamp can use and get rid of points that are not for modules.
That will be done with an wrangle:
float seed = ch('Seed');
if(s@type != 'wall')
{

    if(s@type == 'door')
    {
        u@size = set(1.2, 2.2);
        u@size.x *= fit01(rand(@ptnum+seed+90), 0.9, 1.1);
        u@size.y *= fit01(rand(@ptnum+seed+90), 0.9, 1.1);
        @P.y -= 1.45;//Move down to center it
        f@round = rand(@ptnum+seed);
        i@frame = rint(rand(@ptnum+seed));
        i@plank_dir = rint(rand(@ptnum+seed+5));
        f@rot_left = 0;
        f@rot_right = 0;
        i@module = 0;
    }
    else if(s@type == 'window')
    {
        u@size = set(1, 1.3);
        u@size.x *= fit01(rand(@ptnum+seed+90), 0.9, 1.1);
        u@size.y *= fit01(rand(@ptnum+seed+90), 0.9, 1.1);
        @P.y -= 0.4; //Move down to center it
        f@round = 0;
        i@frame = rint(rand(@ptnum+seed+1));
        i@plank_dir = 0;
        f@rot_left = fit01(rand(seed+@ptnum+10), 0, 180);
        f@rot_right = fit01(rand(seed+@ptnum+15), 0, 180);
        i@module = 1;
    }
    @up = set(0, 1, 0);
}
else
{
    removepoint(0, @ptnum);
}
Here we control the values of our modules.
All attributes we set are matching out parameters exposed in modules HDA.
Feel free to go through the code to get familiar it’s pretty straight forward, most values are just random function based on point number and seed.
One thing I choose to to do here is declare attributes even when I do not need them.
For example rotations for doors and roundness for windows.
This is not necessary.
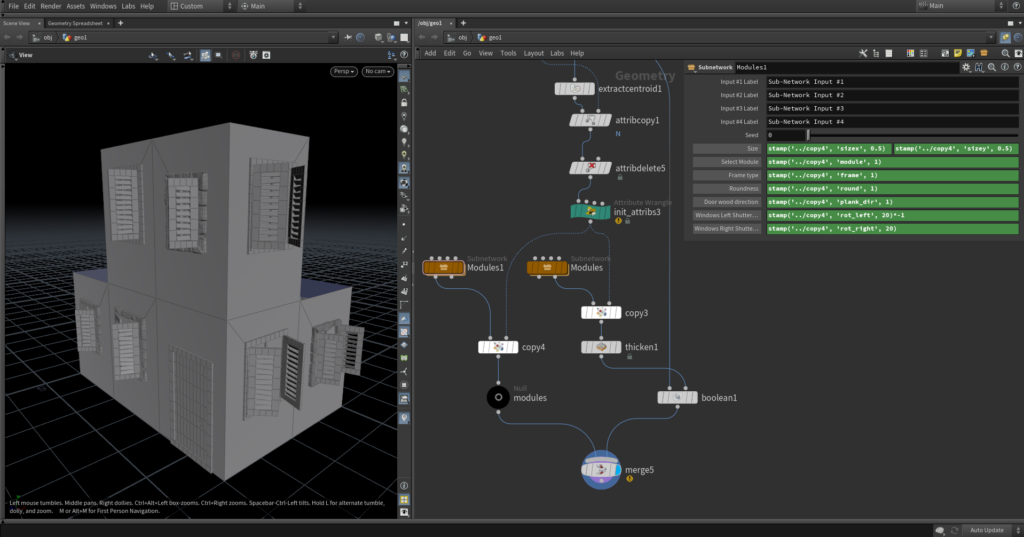
After we got the attributes setup it’s just left to stamp them to modules with copy stamp.
In copy stamp I just made variables the same name as attributes, with and exception of sizex and sizey because stamp can only read float and integer, and stamped them in the corresponding parameters in modules.
We have two copy and two module nodes because stamp works per node and we needed to copy modules as well as a grid to make holes.
Left one is modules, right one is the grid.
That’s the end of our modules, next on the line is walls and after that only roof to tackle. Getting close!